
In simpler terms, Azure Arc empowers you to oversee and control servers regardless of where they are hosted, bringing them under Azure’s umbrella for centralized management and monitoring.
Azure Arc-enabled servers extend Azure’s management capabilities to Windows and Linux servers and VMs that are not hosted within Azure itself. For the purposes of Azure Arc, these machines hosted outside of Azure are considered hybrid machines. Once a hybrid machine is linked to Azure, it transforms into a connected machine, seamlessly integrated into Azure’s ecosystem as a manageable resource.
In this blog, we will learn how to seamlessly migrate your on-premises servers to Azure utilizing Azure Arc, and subsequently, integrate them with Microsoft Sentinel.
Let’s delve into the process.
- Azure Arc Deployment: Commence by deploying the Arc agent onto your on-premises servers to establish connectivity with Azure.
- Integration with Microsoft Sentinel: Employ Data Collection Rules (DCR) to seamlessly integrate your servers with Microsoft Sentinel.
Steps to onboard an on-premises server into azure using Azure Arc
- Access Azure Portal: Begin by navigating to the Azure Portal by visiting portal.azure.com
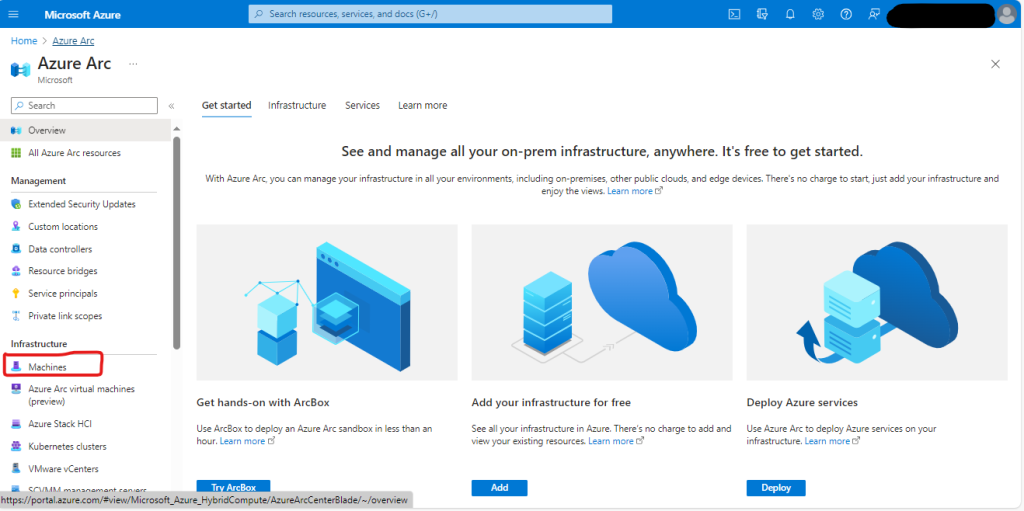
- Navigate to Azure Arc: Once logged in, locate the Azure Arc service by either searching for “Azure Arc” in the search bar or navigating through the Azure services menu.

- Click on “Machine” in the Infrastructure Section: This takes you to the section where you’ll manage your servers.
- Select “Add/Create” and Click “Add a Machine”: This initiates the process to add your on-premise server to Azure.

- Choose “Generate Script”: In the “Add a single server” box, select “Generate script” to proceed.

- Provide Basic Details:
- Select Subscription and Resource Group: Choose the subscription and resource group where you want to deploy your server.
- Select Region: Pick the region that suits your requirements.
- Choose Operating System: Specify the operating system running on your server.
- Set Connectivity Method: Depending on how your machine connects to the internet, select the appropriate option:
- If using a proxy server, input its details (IP address and port number) in the specified format
http://<proxyURL>:<proxyport> - For private endpoint communication, select the relevant private link scope.
- Opt for the “Public endpoint” option if your machine communicates through a public endpoint.
- If using a proxy server, input its details (IP address and port number) in the specified format

- Add Tags: Provide any necessary tags or use the default ones. Tags help organize and manage resources efficiently.
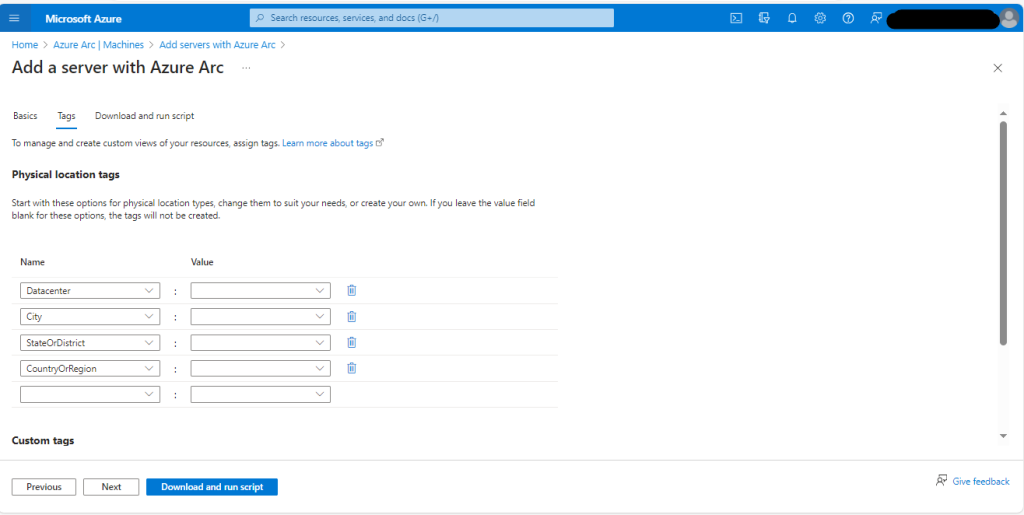
- Download and Run Script: Proceed to the next step and review the summary information. Then, select “Download” to obtain the script.

- Run the Script: Once downloaded, run the script on your on-premise server.
For running script in Windows
- Log in to the server.
- Open an elevated PowerShell command prompt.
- Change to the folder or share that you copied the script to and execute it on the server by running the
./DownloadedScript.ps1script.
If the agent encounters issues initiating after setup completion, review the logs for comprehensive error details. You can find the log directory at %ProgramData%\AzureConnectedMachineAgent\log
For running script in Linux
- Log in to the server with an account that has root access.
- Change to the folder or share that you copied the script to and execute it on the server by running the
./DownloadedScript.shscript.
If the agent encounters difficulties starting up post-setup, refer to the logs for in-depth error details. You can locate the log directory at var/opt/azcmagent/log
After successful configuration of Azure arc you will be able to see the virtual machine in the machine section of Azure arc portal.
Steps to connect the machine to Microsoft Sentinel
- Access Azure Portal: Begin by logging into the Azure Portal at portal.azure.com
- Navigate to Azure Monitor: Once logged in, locate and select “Monitor” from the left-hand navigation menu or search for “Monitor” in the search bar.
- Select “Data Collection Rules”: In the Azure Monitor menu, choose “Data Collection Rules.” This is where you manage data collection configurations.
- Click on “Create”: Look for the button or option that allows you to add a new data collection rule and click on it to start the process.
- In the Basic tab:
- Enter a Rule name and specify a Subscription, Resource Group, Region, and Platform Type:
- On the Resources tab:
- Select + Add resources and associate the machine to the data collection rule.
- If you need network isolation using private links, select existing endpoints from the same region for the respective resources or create a new endpoint.
- On the Collect and deliver tab:
- Select Add data source to add a data source and set a destination. You can one or multiple destination.
- Select Review + create to review the details of the data collection rule.
- Select Create to create the data collection rule.
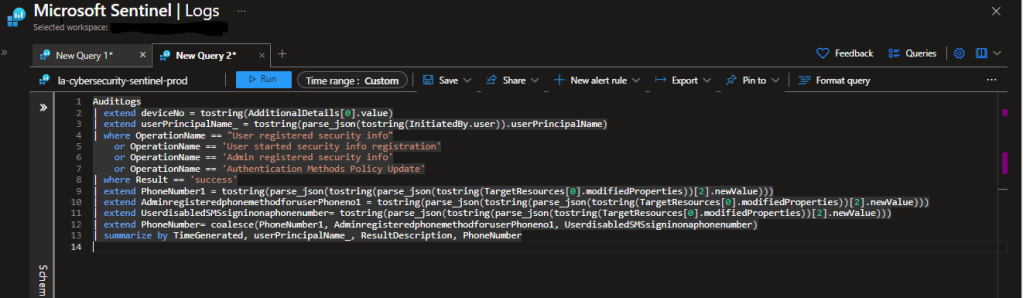
After creating the data collection rule (DCR), you’ll gain visibility into the collected logs within the tables designated for Linux and Windows in Azure Sentinel, Microsoft’s cloud-native security information and event management (SIEM) solution.


Leave a comment